
This article reviews how you can reschedule an existing appointment in your Moxie Suite Account.
Jump to a section
Rescheduling on the schedule page
Rescheduling on the appointment page
Reschedule on the schedule page
1. Log in to your Moxie Suite account using this link.
2. If you're on any other page click Schedule on the Global Nav.

3. Once on the Your Schedule page, find the appointment you want to reschedule. Click the three purple dots on the top right-hand side of your screen. Select Edit appointment.
4. Once on the Select time page, select the correct date and time for your appointment. Once you've chosen the date and time, click on the purple Confirm changes button at the bottom of your screen.
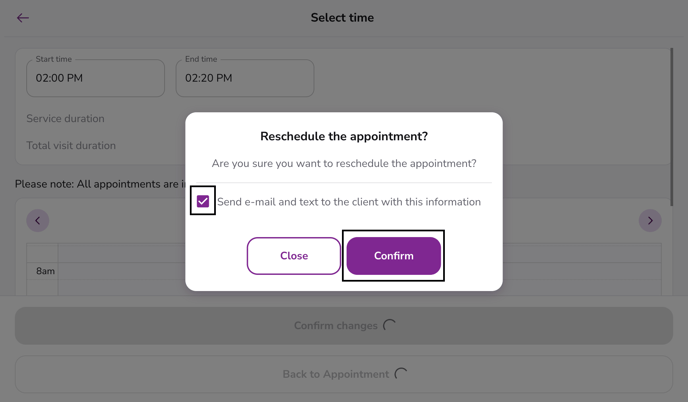
✏️ Note - You may choose to email and text the client with this info. If you want it sent, leave the purple check box ticked on, if you do NOT want this sent, toggle off the purple checkmark.
🎉 You've successfully rescheduled the appointment. You will see this on the Appointment Details page after completing the previous "Confirm" step.

Reschedule on the Appointment Details page
1. On your schedule page, click on the appointment card you want to reschedule.

2. Once on the Appointment Details page of the appointment you want to reschedule, click the three purple dots on the top right-hand side of your screen. Click on Edit appointment.

3. Follow along with the previous steps to edit the appointment and confirm the changes.
Watch the video walkthrough below on rescheduling an existing Moxie Suite appointment.