
This article reviews how you add, edit, or remove retail products in Moxie Suite.
Jump to a section
Adding a retail product
1. Log in to your Moxie Suite account using this link.
2. Within the Global Nav click Services & Products > Retail products.

3. On the Products page, click the purple Add a product button.
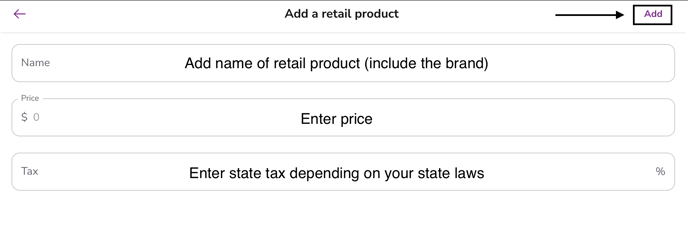
-
- Add the name of the product (i.e., ZO Bright Alive SPF)
- Add the price of the product (i.e., $55)
- Include tax depending on your state laws
- Once all the above information has been completed hit Add on the top right-hand side of your screen
Editing a retail product
1. On the Global Nav click Services & Product > Retail Products (see the previous section for images)
2. On the Products page search for or scroll to find the retail product.

3. After finding your retail product click on the ellipses > Edit on the top right corner of the product card.

4. On the Edit a retail product page you can update the:
-
- Name
- Price
- Tax

How to remove a retail product
1. On the Global Nav click Services & Product > Retail Products (see previous section for images)
2. On the Products page can search for your retail product or scroll to find your product.
3. After finding your retail product click on the ellipses > Delete on the top right corner of the product card.

4. You'll receive a pop-up confirming you'd like to delete the retail product. Click the Delete button to confirm you'd like to proceed.
❗Important - this process is irreversible as shown on the pop-up.

Congrats, you now know how to add, edit, and remove retail products 🎉!